Sekiro walkthrough part 3 - Find the Flame Vent, Shinobi Axe and fight General Tenzen Yamauchi
With your chained nemesis defeated, it’s time to press on further into the world of Sekiro.
From the shrine, grapple to the tree in front of you and take out the two guards below like you did before the Ogre fight.
Run up the hill and grapple up to the hole in the wall above you. Inside, turn left and grab the item in front of you - it’s a Gourd Seed, a hugely valuable item that lets you have another drink from your Healing Gourd before refreshing it.
Run back to the shrine and travel to the Dilapidated Temple. Speak to Emma and she’ll upgrade your Gourd. Go inside and talk to the Sculptor while you’re at it, and he’ll unlock the ability to gain Skills. We’ve got a whole page on the best skills in Sekiro, so check that out to see which ones we think you should pick up.
Now it’s time to go on a bit of a diversion. Walk over to the special Buddha statue in the Sculptor’s room and interact with it. Since you got the bell from the old woman in the area before the Ogre you’ll enter an ethereal vision of the Hirata Estate three years ago.
Hirata Estate
Walk forward and interact with the Sculptor’s Idol, then jump down the cliff, swinging on the branches along the way. Continue to follow the path, speaking to the injured warrior on your left.
Once you’ve finished speaking, jump across to the bridge and engage the guard. When he’s done, continue across the bridge and face the torch-wielding enemy. Finish him off aggressively, since he has an unblockable thrust attack if you let him get going.
Continue along the bridge, but jump off the right-hand side before you’re noticed by the next guard. Ignore him and continue around to the right. There’s another guard and a wolf here that you need to take out. When they’re done, follow the area around to the left and you’ll see a grapple point that leads up to a gate with another torch-wielding guard and three wolves.
Stealth kill or ignore them, then jump up onto the gate. On the other side is a Sculptor’s Idol that you can rest at, so activate it - you’ll be travelling here a lot.
Turn around from the idol and grapple back up to the gate. Now use the rooftops to move around to the left, grappling up to the higher rooftop. You can drop down and collect the items here, but to advance stealth attack the guard below you.
This will probably aggro the two further up the path. Be very careful of the archer enemies. Their flame arrows do a lot of damage and deal burn status.
Focusing on the archer on the left, run towards the two enemies, jumping and slashing at the archer, as well as sidestepping his arrows, before deflecting and killing the swordsman.
This will aggro another archer - deal with him in the same way as the first.
To your right is a hole in the wall - go through it.
Flame Vent Tool
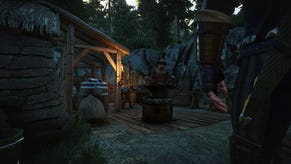
There’s another group of three enemies here, one torch guy, one archer, and one tougher hammer man.
The swordsman should be easy to stagger and deathblow, if you block his attacks. Then you’re more likely to have to dodge then attack the hammer guy. Finally rush and take out the archer.
Jump on the house to your right, then grapple to the tall tree across the way. There are a lot more enemies in this area, so you’ll need to stay a bit quieter.
From the tree, jump down to your left, using the houses as cover and take out the archer perched on the rooftop in front of you.
Next take out the torch-wielder and three wolves that’re patrolling the alleyway - wait for them to walk away from the fire and it shouldn’t alert the others.
Now jump up onto the right-hand rooftop, there’s a hidden guard on the other side. When he’s defeated move on to the second hammer guy in the main alleyway. You should now only be left with three enemies. Two around the fire, and one stood past it.
Approach from the right and take out the guard standing on the right of the fire, then sneak all the way around the back of the fire using the house as cover. Jump onto the roof of the house and stealth kill the torch guard. You can then kill the final guard sat by the fire.
Before you leave it’s imperative that you interact with the fire, because it contains a very important item: the Flame Barrel.
You can take this to the Sculptor for the Flame Vent prosthetic tool.
Shinobi Axe
With this in hand, turn around and head up the hill, taking out the swordsman in your way.
Continue up the path and speak to the injured man on your right. At the end of the path, turn left and go to end and open the gate. Now turn around and grapple up to the top of the gate on your right.
Kill the guard in the doorway and eavesdrop on the guards in front of you.
After they’ve finished yapping, finish them both of, stealthing the tougher hammer guard on the right then fighting the swordsman.
Now walk over to the shrine they were facing and open the door. Inside is the Shinobi Axe tool - a very powerful weapon indeed.
You’re done in this area for now, since the rest of it’s a bit hard at the moment, so return to the Estate Path shrine through the door you opened earlier. Go back to the Dilapidated Temple and give your new toys to the Sculptor who will fit them to your arm.
You can then equip and use them in battle.
At this point, if you’ve died a fair few times like I had the Sculptor will have become ill with Dragonrot.
To find a cure, you’ll have to go and get a blood sample from another afflicted. An easy person to get one from is the old lady that gave you the bell in the Ashina Outskirts - she becomes afflicted early and is easy to reach.
General Tenzen Yamauchi
Now retrace your steps to where you found the seed via the Outskirts Wall - Stairway idol shrine.
From where you found the Seed, head right into the next area.
On your left as you walk out of the door is some long grass, crouch into it and walk along next to the wooden fence until you’ve passed the gunner. You can then creep around him and stealth him down.
From there, retrace your steps back through the grass and inside the building. Go around the corner and through the hole in the wall. Grapple to the tree branch and jump across into the grass on your right. Walk across the roof to your left and kill the signal enemy that bangs a pot in front of you. Then drop down and take out the drop overlooking the ledge.
Jump back up to where you killed the pot-banging enemy.
The body below should grab the attention of another patrolling guard after a while so take him out as he comes to investigate.
With the way clear, you should now be able to creep up behind the swordsman in front of you and take him out.
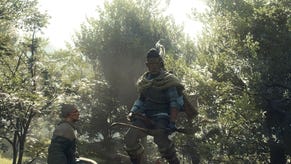
This should leave you with two basic enemies and a large samurai. Hop up onto the wall in the middle of the area and note where they are. Wait for the samurai to look the other way, and stealth both of the smaller guys.
Now the samurai, General Tenzen Yamauchi, is the only one left.
He usually walks back-and-forth in the centre of the ditch, so take a position where you can easily get to his back as he’s looking the other way and stealth attack him to rip out one of his health bars.
You should be able to get another hit in while he’s dazed too.
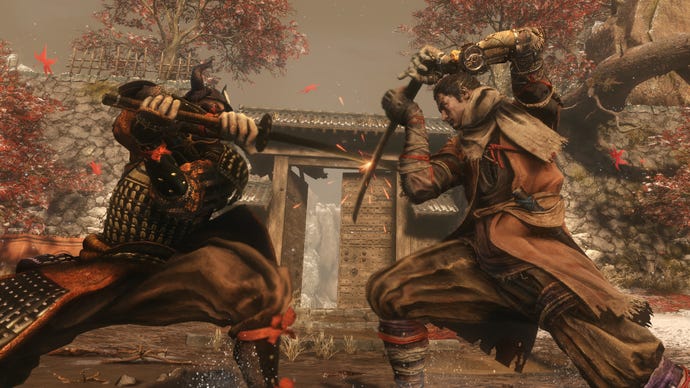
Tenzen fights much like the first large samurai you faced. Focus on deflecting his normal sword slashes, and dodging his unblockable sweeps.
You can whittle his health away by getting single counter-slashes in at the end of his combos. As his bar depletes, it gets easier and easier to break his posture.
When he’s at about half health start to be more aggressive with your deflects and throw more attacks of your own in for him to block - this will keep his posture gauge nice and high, so that eventually he’ll be open to a deathblow.
Taking him out nets you a Prayer Bead, and there’s some Scrap Iron to pick up in the ditch.
To continue, go through the open gate at the far end of the ditch. On the other side turn left.
Please don’t go right at the moment, only despair waits for you that way.
Now that you’ve gone left, follow the path around until you see a broken bridge.
Jump down to the left-hand side of the broken bridge, and you’ll find an Idol.
Rest here and regenerate your Gourd.
Large boi
This next bit is a good’un.
From the Idol, jump down to the left.
Keep following the path down to the left and grapple onto the branches below, then jump down onto the ledge below. Keep jumping down and to the left, then take a leap of faith off the edge and grapple to the next branch.
You’ll see a new friend slithering away - grapple across to the left, then jump down into the long grass below.
Over on the right is another grapple point that you’ll have to jump to reach, wait until the Giant Snake has passed and has its head up in the air to make the leap.
Run into the cave in front of you, and out the other side.
Drop down the ledge and head immediately left and hug the wall. Shimmy around as the Giant Snake comes the other way, then make a break for it and jump into the long grass on the other side of the gap when he’s moved.
Head forward and to the left through the grass, then hug the wall to shimmy across the ravine.
On the other side there a little Palanquin, wait for the Giant Snake to move from over the top of you, then crouch walk towards it and enter.
The snake will come in close, hold your nerve and wait until you get the red deathblow marker before hitting the attack button.
With the Snake incapacitated, turn around and make a run for it. Grapple to the tree branches, then run and jump up through the cave.
On the other side, grapple again to the trees and up to the ledge. Grapple up another couple of times and you’ll see a sweet, sweet Sculptor’s Idol marking the next checkpoint.
Sekiro guides
- Sekiro walkthroughs
- Sekiro walkthrough Part 1 - Yamauchi, General Naomori Kawarada
- Sekiro walkthrough Part 2 - Chained Ogre
- Sekiro walkthrough Part 3 - Find the Flame vent, Shinobi Axe and fight General Tenzen Yamauchi
- Sekiro walkthrough Part 4 - Find the Shinobi Firecracker and fight the horse-rider
- Sekiro walkthrough Part 5 - How to reach Ashina Castle
- Sekiro walkthrough Part 6 – finishing the Hirata Estate
- Sekiro walkthrough Part 7 – Ashina Reservoir
- Sekiro walkthrough part 8 - Senpou Temple, Long-Armed Centipede Sen'un
- Sekiro Walkthrough Part 9 - Ashina Castle Upper Tower
- Sekiro walkthrough Part 10 – Where to find Lord Isshin
- Sekiro walkthrough Part 11 – Ashina Depths and Hidden Forest
- Sekiro walkthrough Part 12 – Mibu Village, Corrupted Monk Spirit, Screen Monkeys
- Sekiro walkthrough Part 13 – Sunken Valley, Gun Fort and Bodhisattva Valley
- Sekiro walkthrough Part 14 – Owl and Fountainhead Monk Cheese
- Sekiro walkthrough Part 15 – Finding a Persimmon and collecting the Frozen Tears
- Sekiro walkthrough Part 16 – Mibu Manor, Fountainhead Pot Noble and Dragon
- Sekiro walkthrough Part 17 – Clean up and Isshin Sword Saint Cheese
- Sekiro - best ending guide
- Sekiro skills and combat
- Sekiro - top combat tips
- Sekiro - best skills
- Sekiro - Boss guide
- Sekiro crafting and items
- Sekiro - how to remove Rot Essence and cure the Dragonrot
- Sekiro - crafting and upgrade materials guide
- Sekiro - Gourd Seeds and Prayer Beads locations
- Sekiro - Treasure Carp Scales Guide
- Sekiro - Mask Fragment Guide
- Sekiro - where to find more Divine Confetti and Snapseeds
