Animating SVG Files With SVGator

Email Newsletter
Weekly tips on front-end & UX.
Trusted by 200,000+ folks.
(This article is kindly sponsored by SVGator.) Animated SVG files have become very popular. They are entirely scalable (because they are vectors), small and 100% code-based, which allows for so many transformations and tweaks. This, however, comes at a price: the steep learning curve for complete beginners.
SVGator pledges to solve this problem, making it really easy for anyone to make simple animations using a familiar interface. It’s a web-based animation app that lets you import, animate and export SVG animations, and it eliminates the need for beginners to learn to code. We tried it, and we really loved it.
Start Using The App
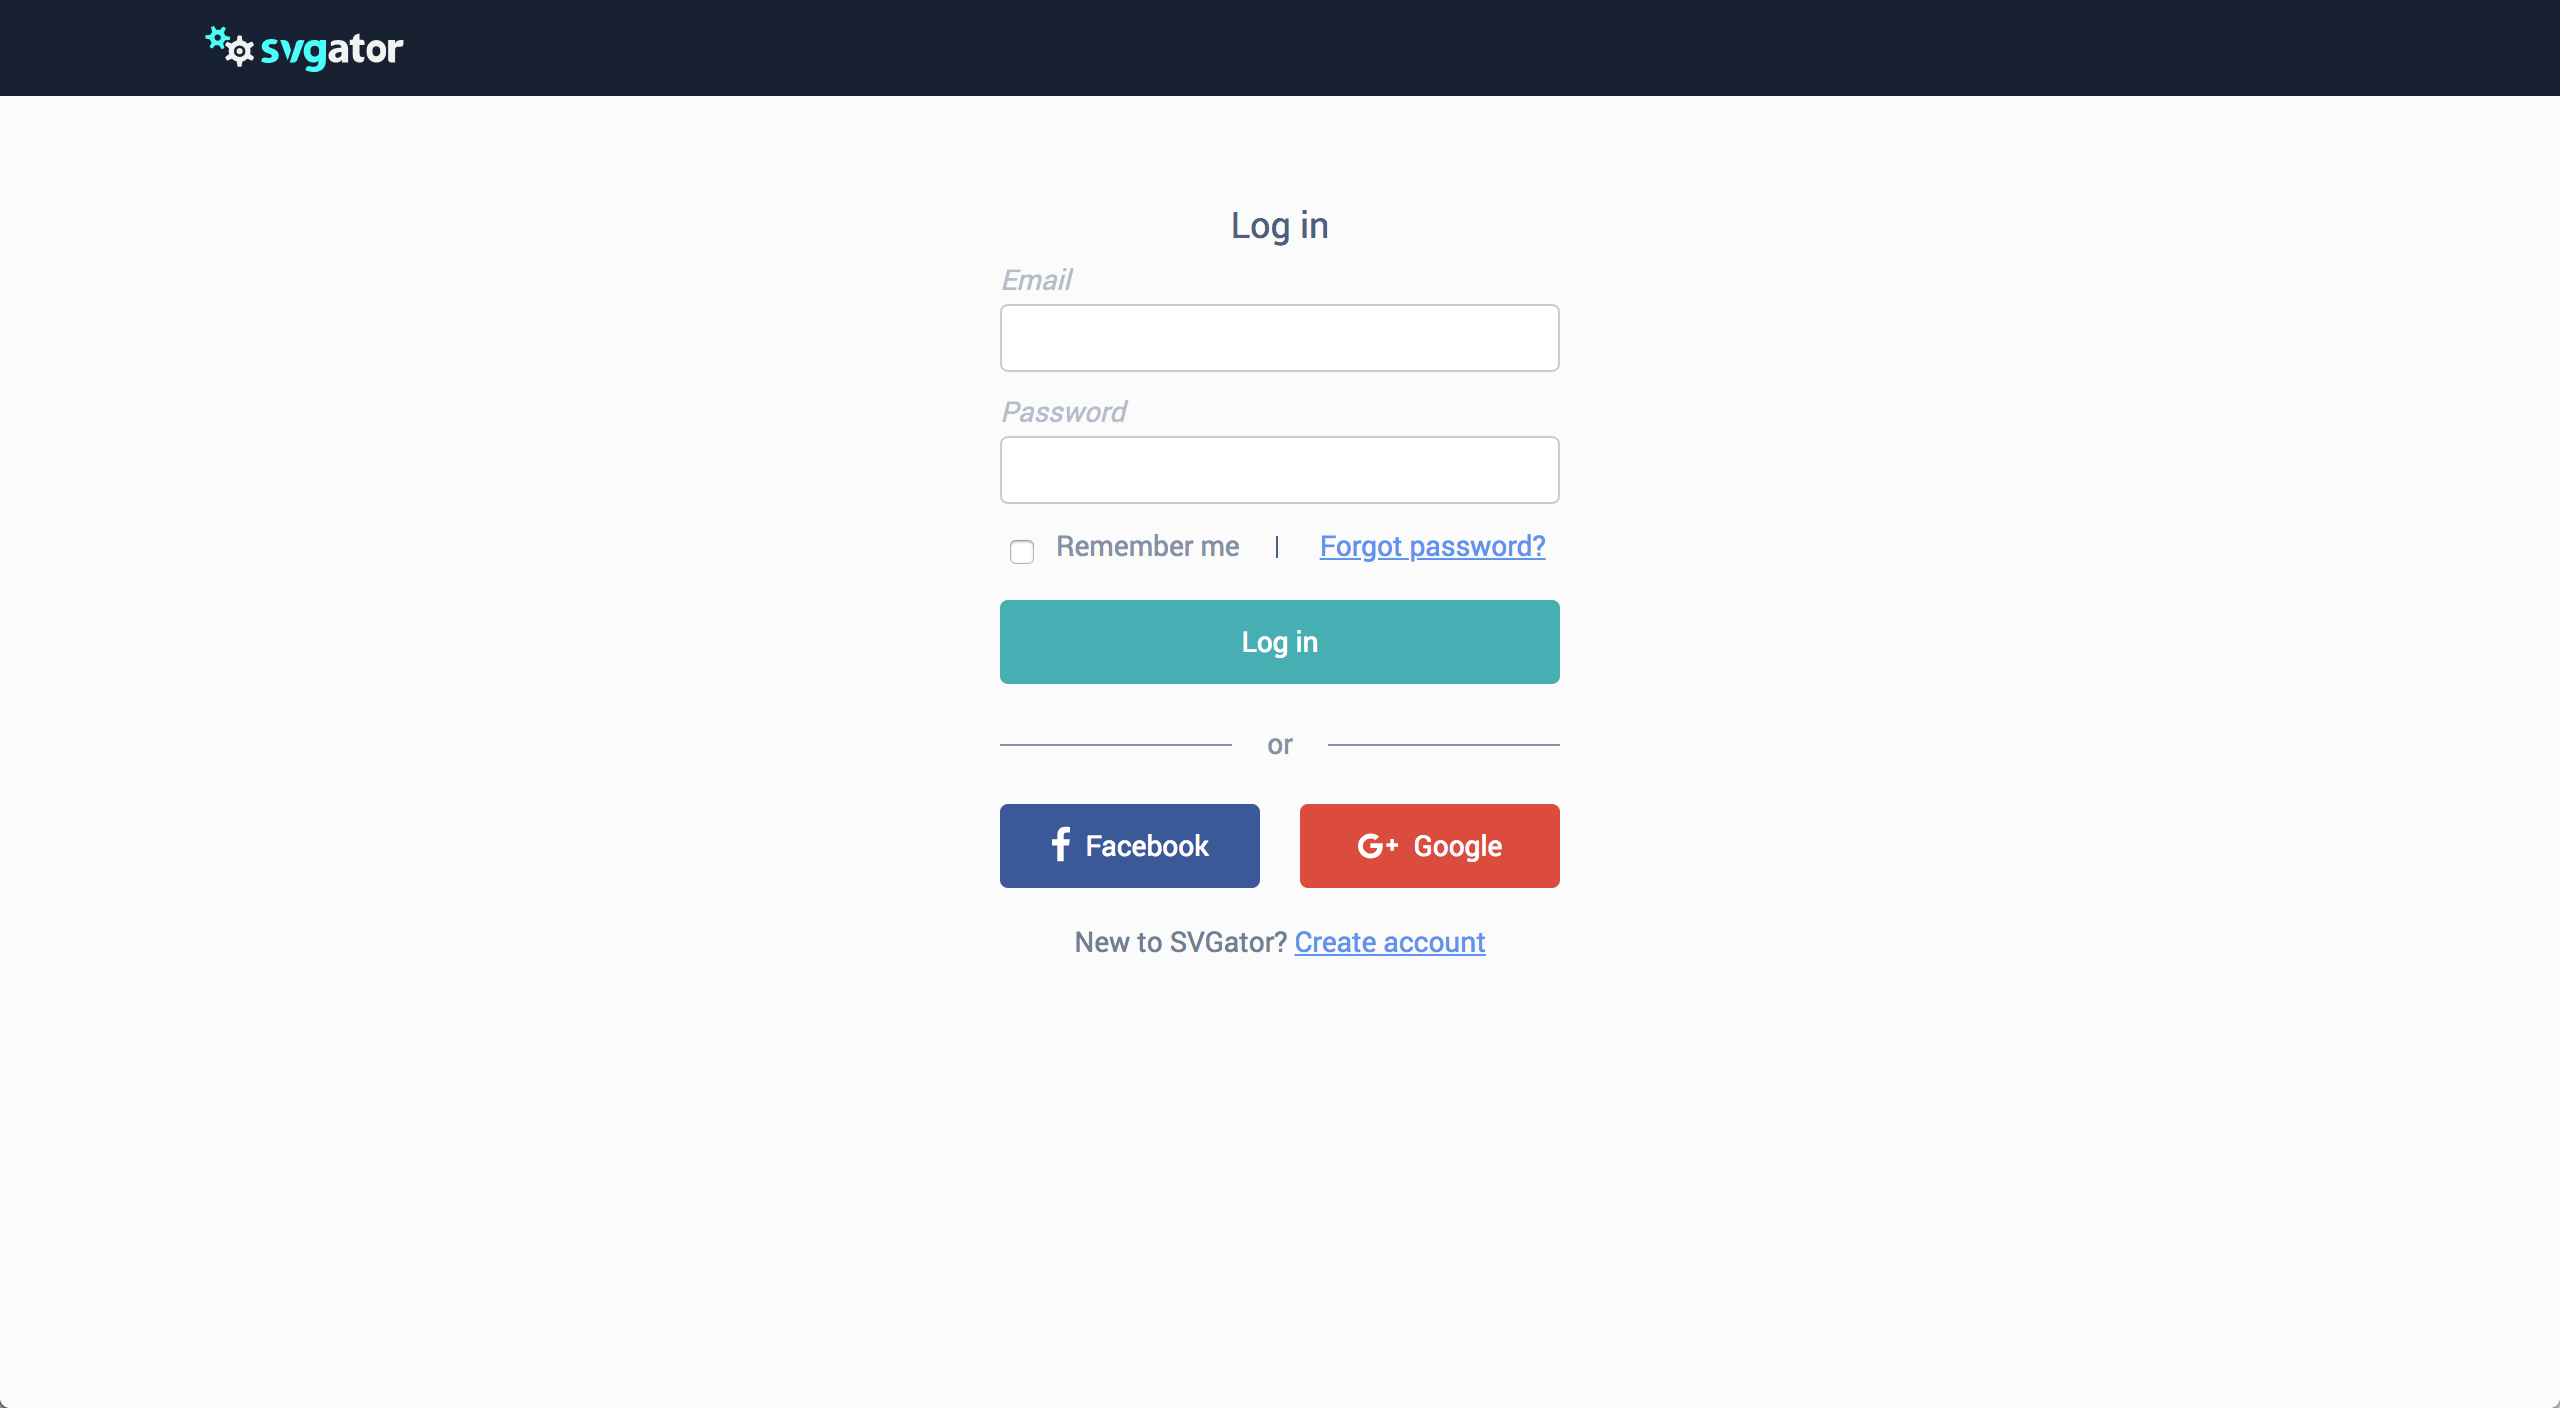
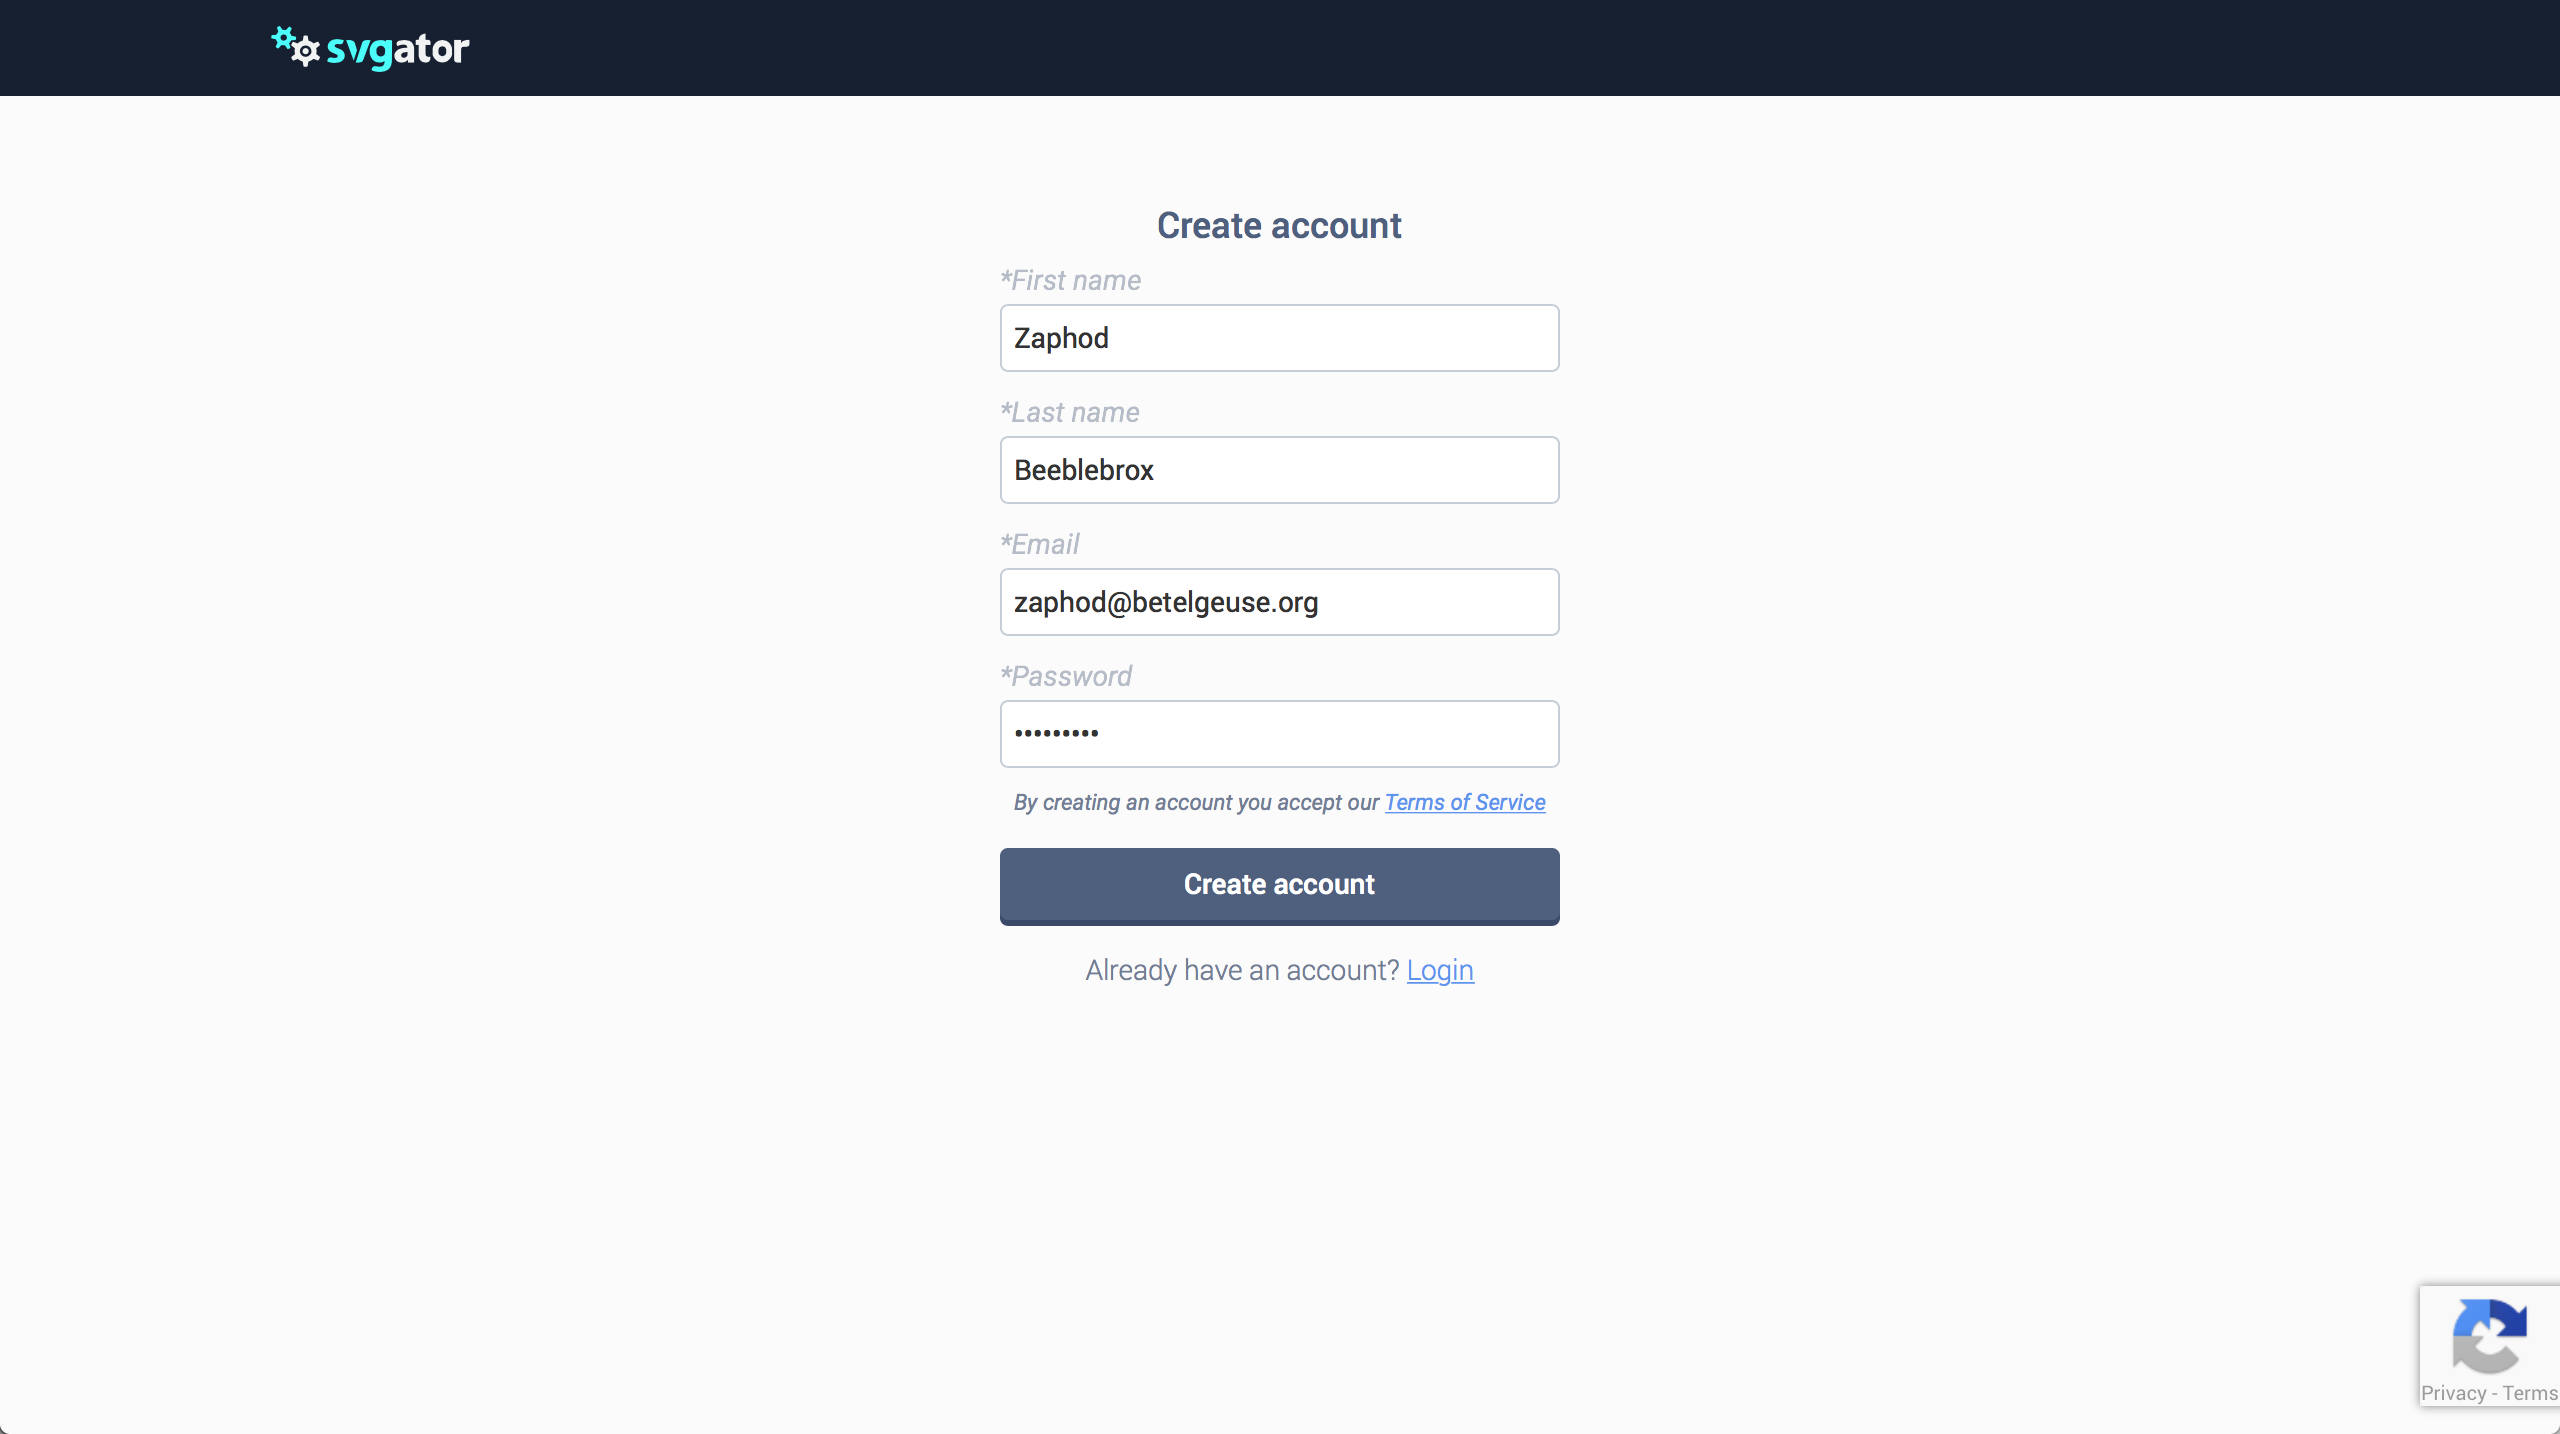
Head over to https://www.svgator.com to start using the app. The sign-up process is pretty straightforward (figures 1 to 3): Click “Animate now”, then “Create account”, fill in your details, and you’re good to go.

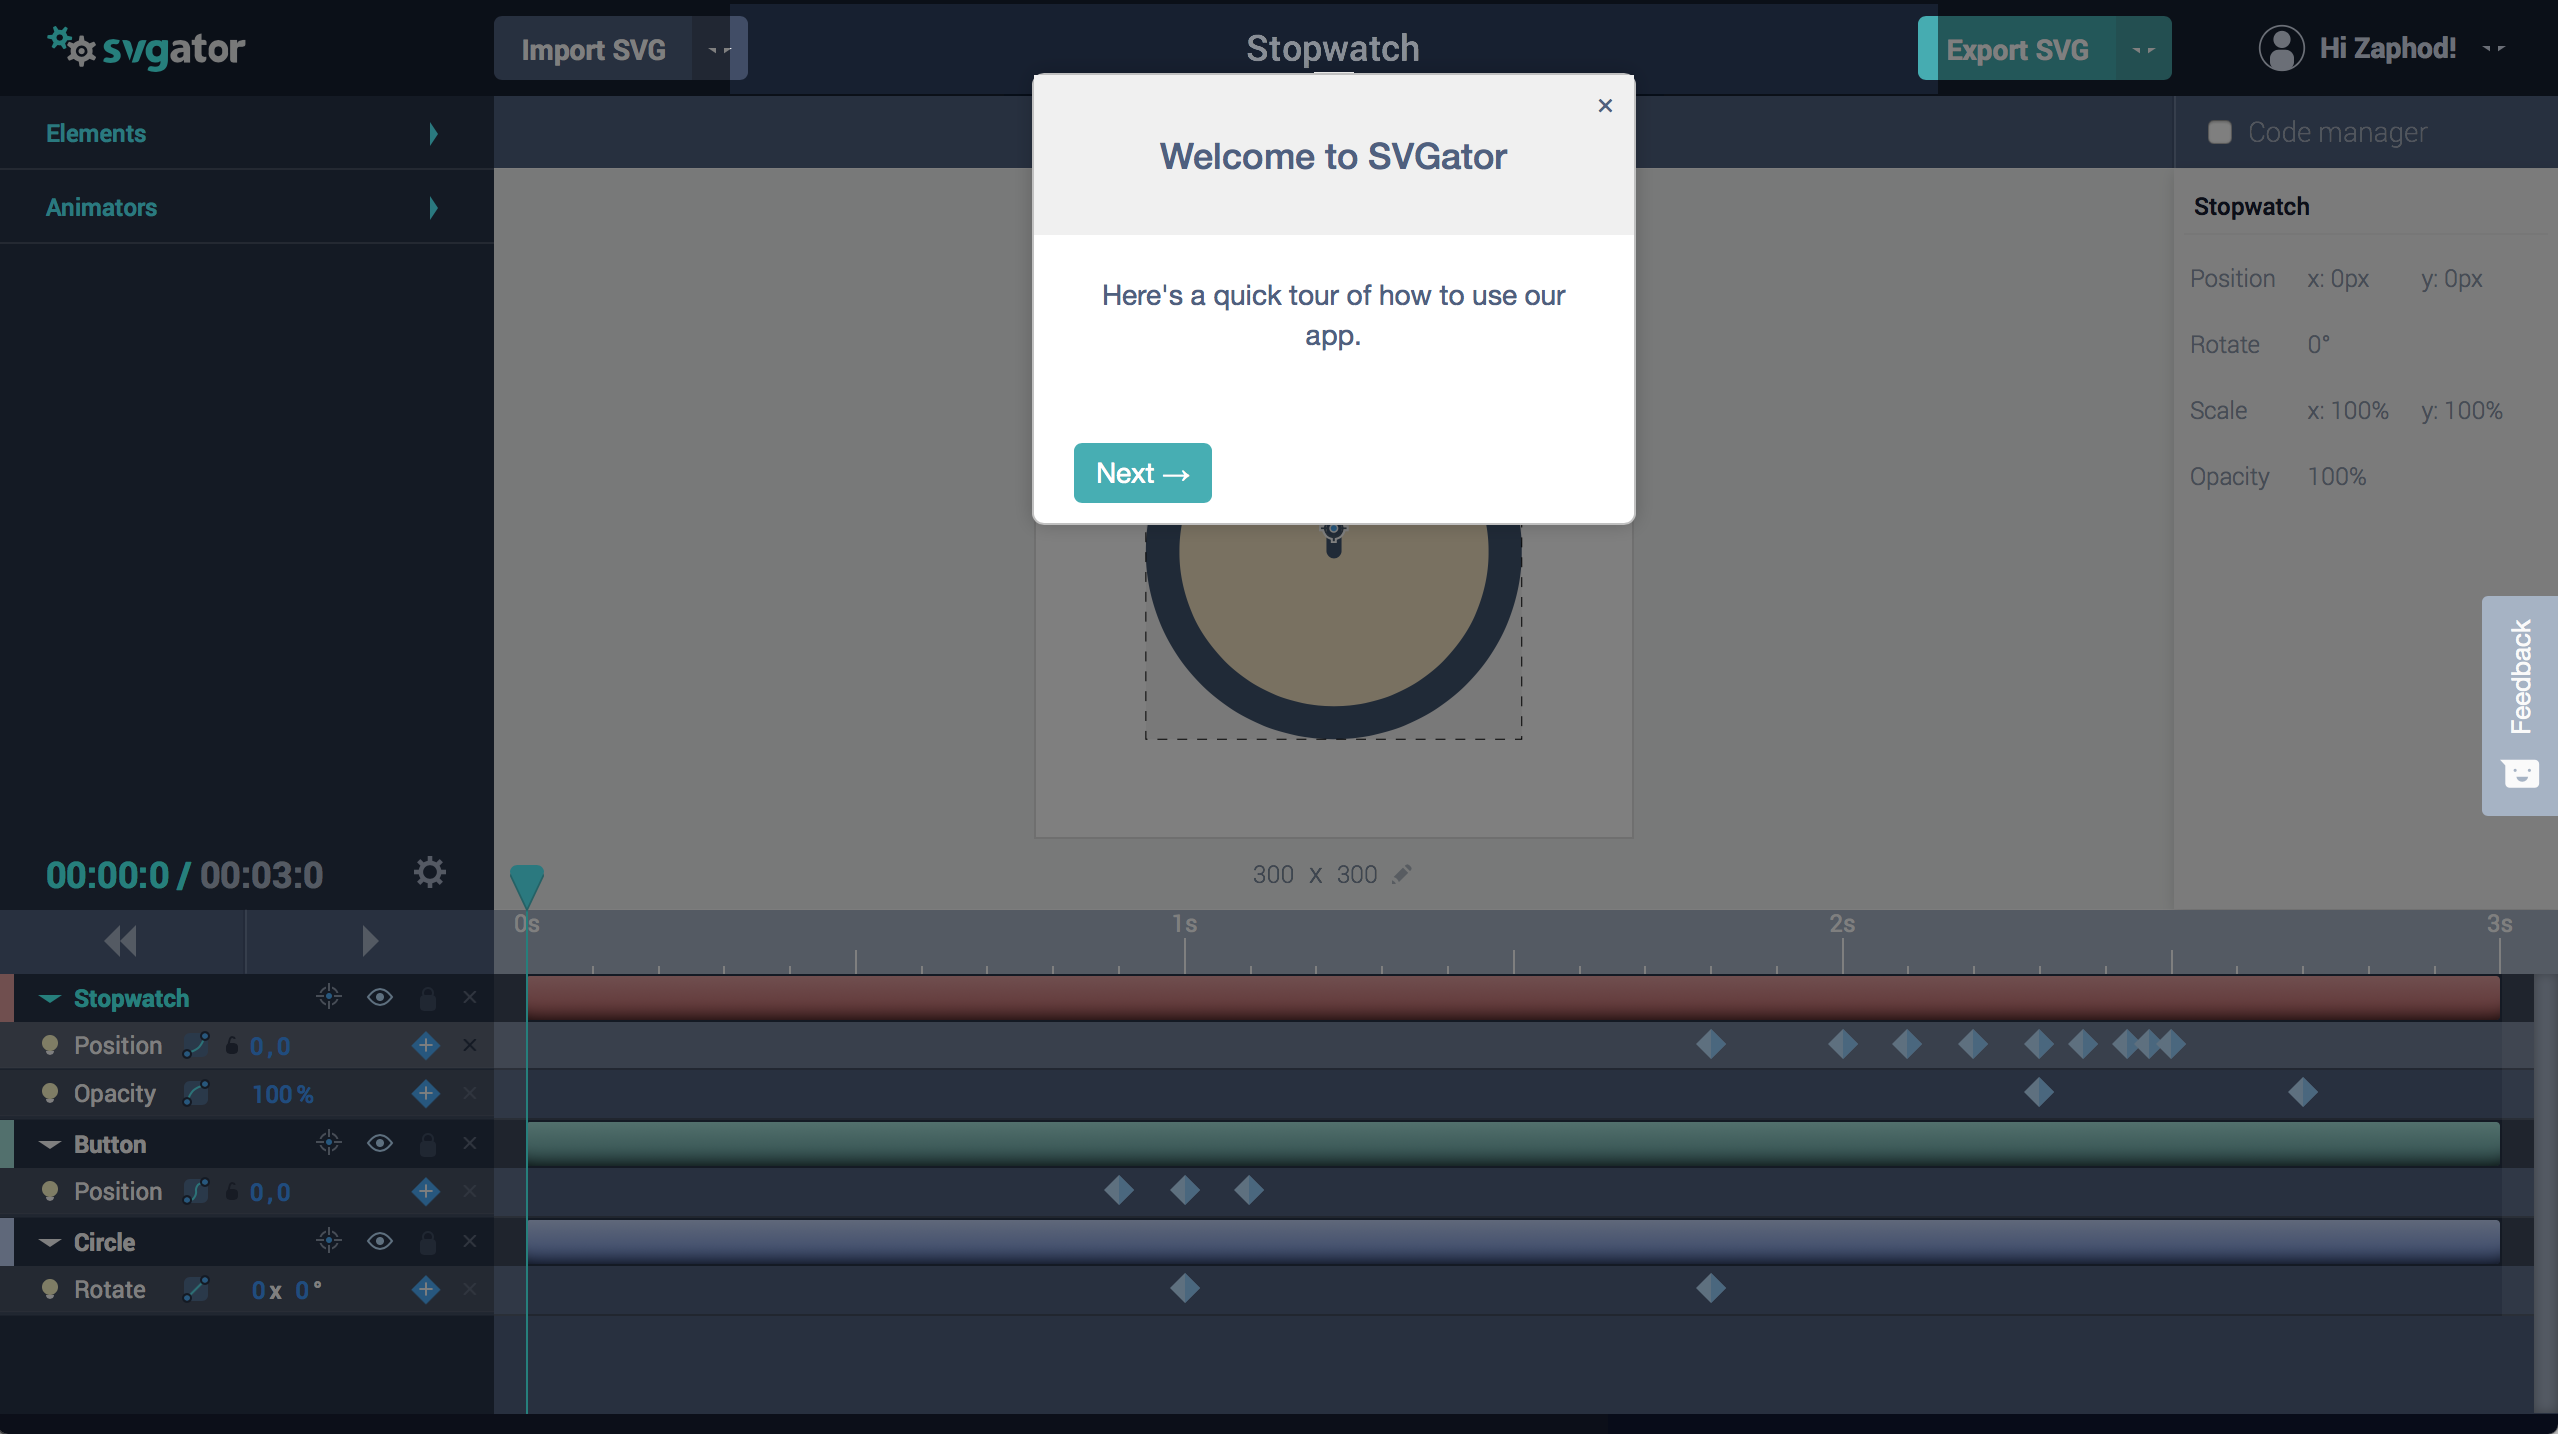
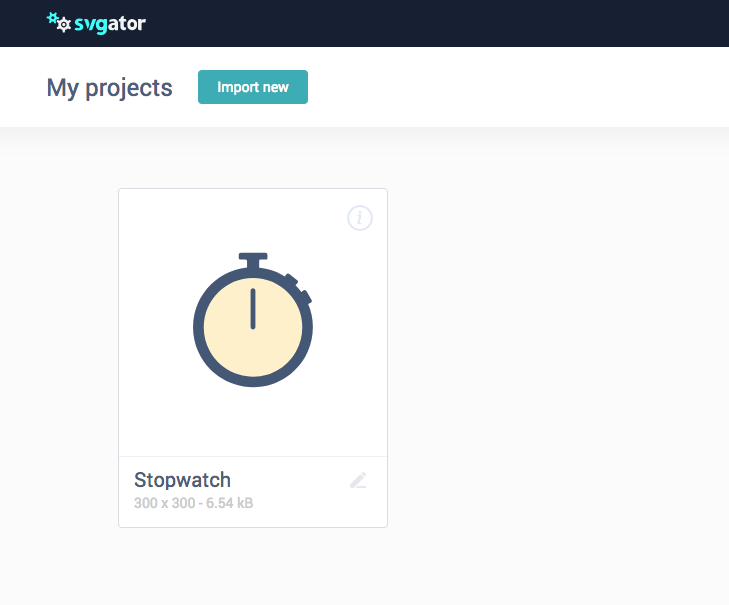
You’ll be taken directly to the sample “Stopwatch” project, which let’s you explore SVGator’s features. If you can’t find your way within the app, there’s a neat tutorial (figure 4) that will guide you in how to start using it: Import a static SVG, add elements to the timeline, and add animators to elements and keyframes to animate the four currently available properties (scale, opacity, position and rotation).
If you’ve ever used an animation app, the user interface of SVGator should feel pretty familiar to you, and everything will probably feel in its right place. You only add elements that you’ll animate, which keeps the timeline clean and easy to scan.
The starter animated clock project does a great job of introducing you to SVGator. You can always come back to it and use it as a reference.
Now that we have the basics out of the way, let’s jump into making our own animations!
What We’ll Make
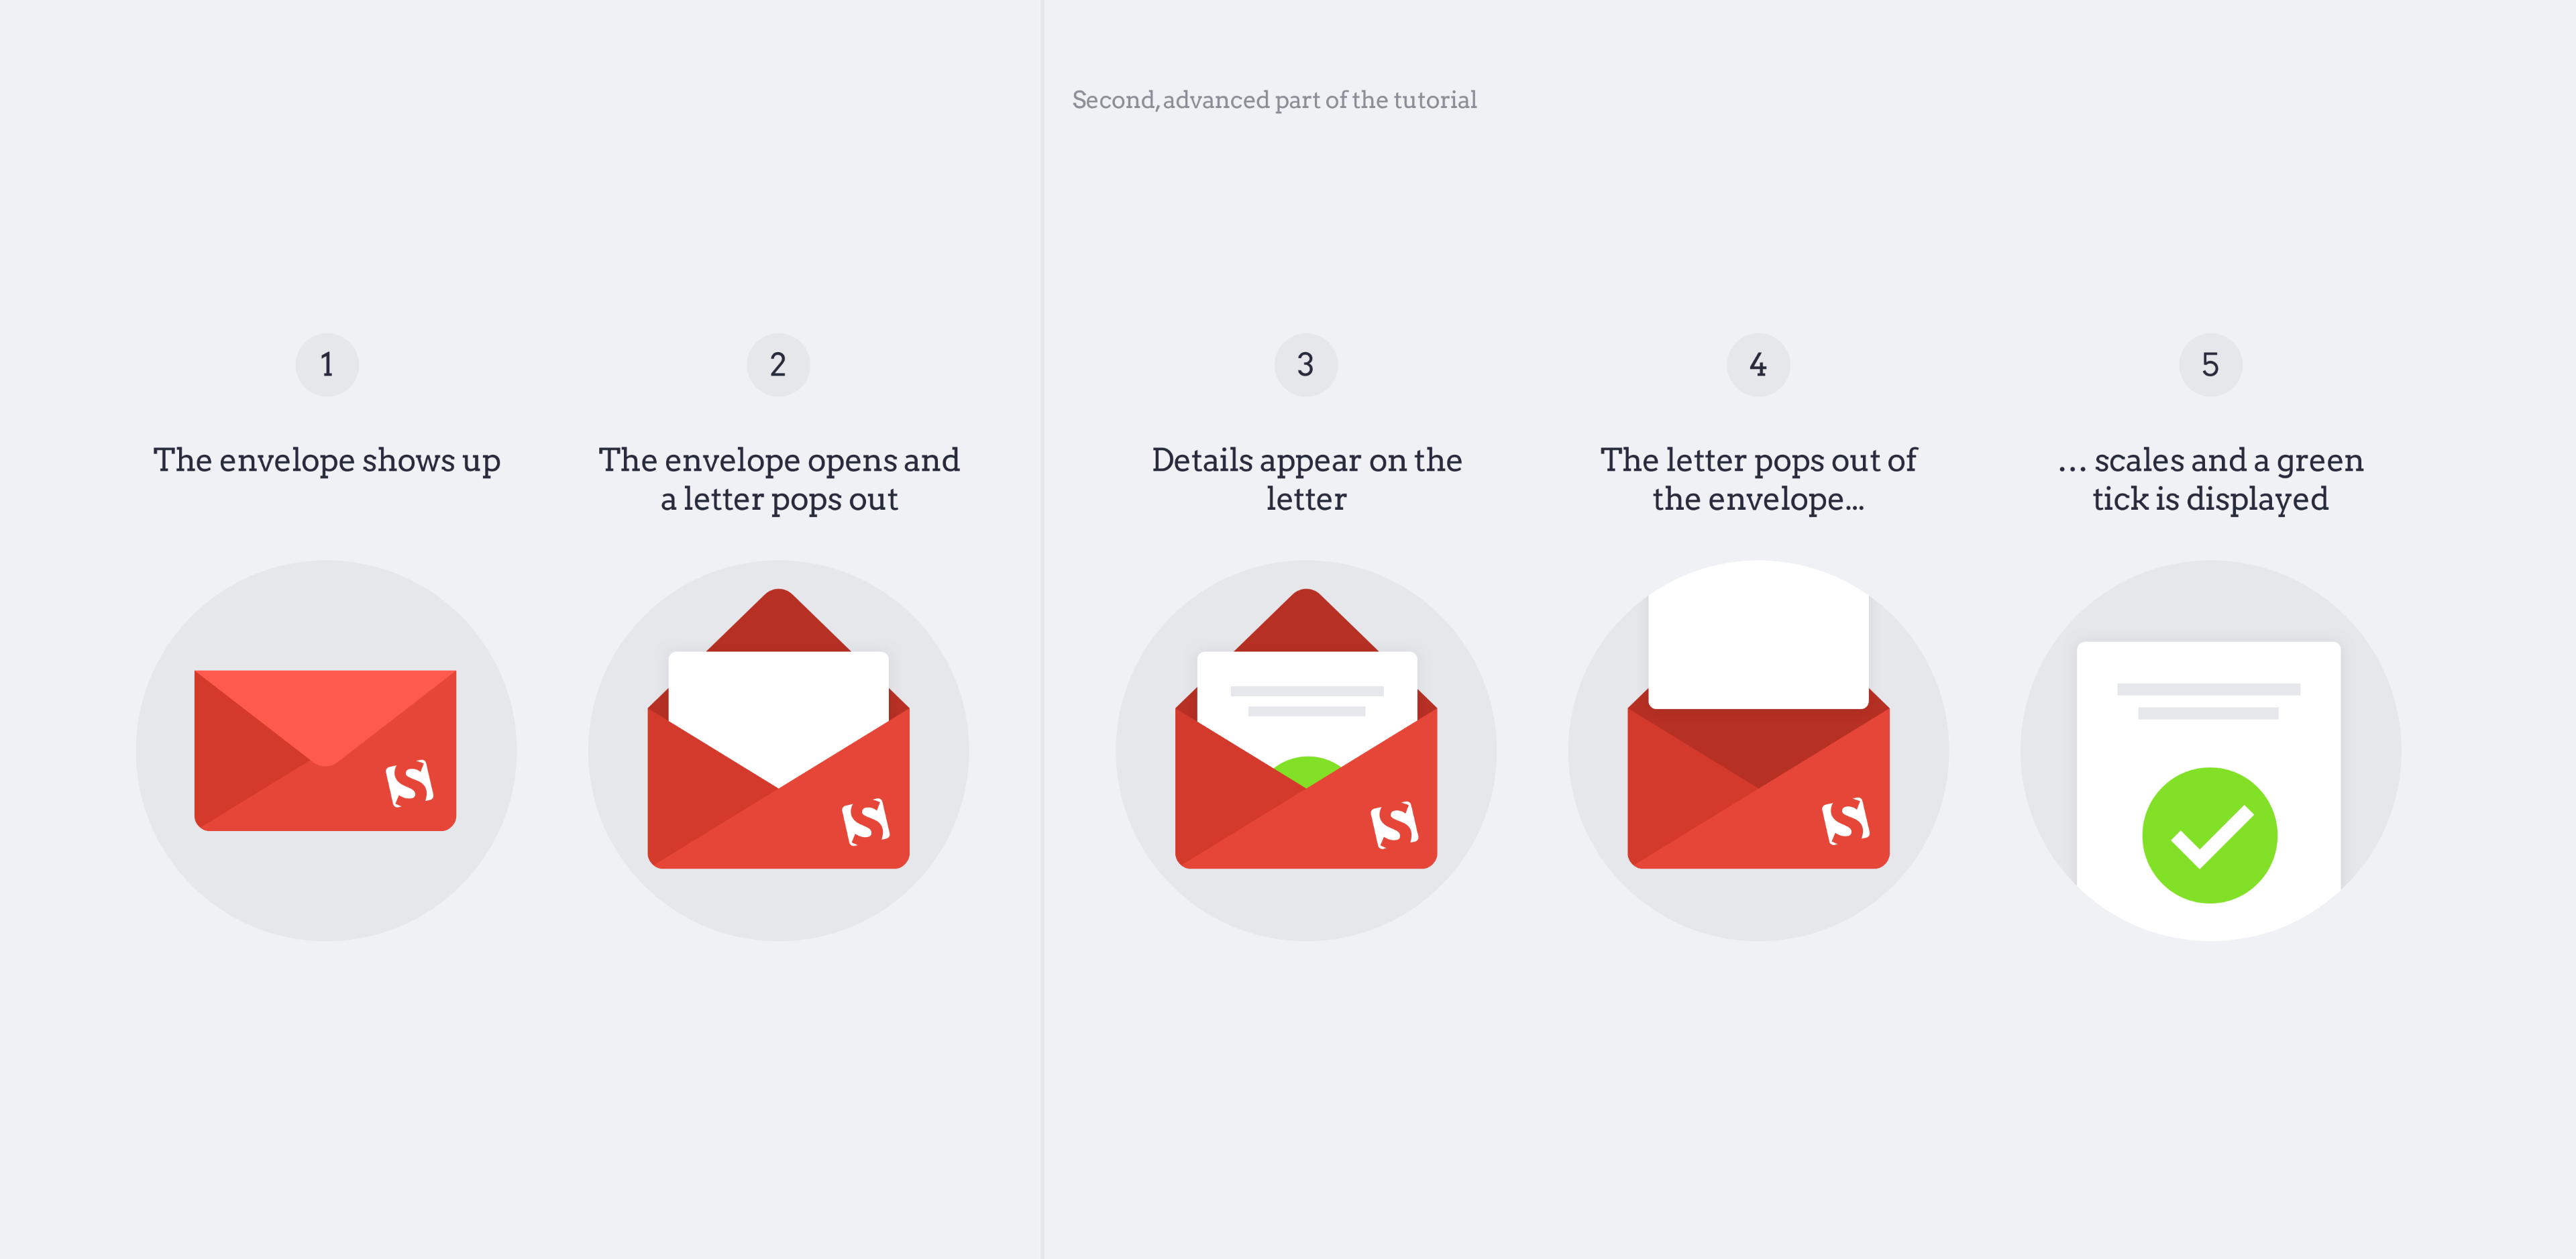
Check out this simple envelope icon we designed in Sketch (figure 5). It starts off closed, then it opens, and a letter pops up, followed by its contents. Then, the letter jumps out of the envelope and scales up to show the green checkbox.

Here’s a summary of the process:
- We’ll begin by making a simple storyboard to visualize our icon in its different states. While we’re at it, we’ll constantly sync up with SVGator and import elements of the icon in order to ensure that everything works as expected.
- Then, we’ll create a master copy of the icon, which will include every single element that we’ll need, and export it to SVGator. We might need to modify this master copy a lot throughout the process.
- Next, we’ll do the whole animation in a single SVGator project and export it, making sure it works as expected.
- Finally, we’ll include the icon in a simple precoded newsletter form to see how it looks in a real web environment. We’ll also see it resize for smaller resolutions.
- You can download everything here.
Let’s get started!
Part 1: Create And Export An Icon From Sketch
- There are some differences between designing a simple SVG icon and designing an SVG icon that you plan to animate later. For starters, it’s important to note that it should be made up of fairly simple shapes, and you should plan your animations around simple transitions based on manipulating only the following: scale, rotation, position and opacity. These are the only four properties that SVGator currently let’s you animate, so if you’ve drafted something more complex, you won’t be able to do it.
Make A Simple Storyboard To Save Time
Storyboarding lets you visualize all of your transitions before you actually import them in SVGator. It also makes it easy to test transformations before committing to making the whole animation. It often happens that you’ll discover an issue with the illustration that should have been done differently in Sketch, and so you have to go back in and change it. Then, you need to reimport the whole file in SVGator and start with the animations from scratch. Because you wouldn’t want to do this every single time, storyboarding helps by forcing you to plan things in advance.
For example, I initially planned for the envelope to stay more towards the bottom of the screen, but after importing it to SVGator and playing with the closing and opening, it was clear that it needs to stay in the middle while closed and slightly down when opened — a detail that was omitted in the static images.
Tip: Check out the storyboard in the Sketch file → Artboard “storyboard”.
Layer Naming And Organization
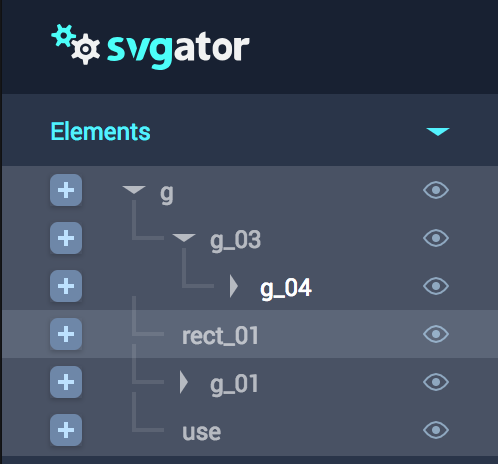
If you name your layers in Sketch, it will work as expected, and all names you’ve assigned in Sketch will be transferred to your project in SVGator. But if you use SVGO Compressor or a similar plugin to make the SVG files smaller, the names will disappear, and SVGator will replace them with ones based on the HTML tag, and you’ll end up with something similar to what’s shown in figure 7.
Tip: If you’re already using SVGO Compressor for other SVGs and don’t want to disable it, just drag and drop the file from the export preview area in Sketch to your desired location (figure 8). This will circumvent SVGO Compressor and export the SVG as is!
Using groups is great, too, because the app recognizes them, and you can even simultaneously animate a layer and its parent group, adding a bit more complexity.
We haven’t encountered any limitation on the number of layers used, but then again, our icon is pretty simple.
Preparing The Icon for Animation
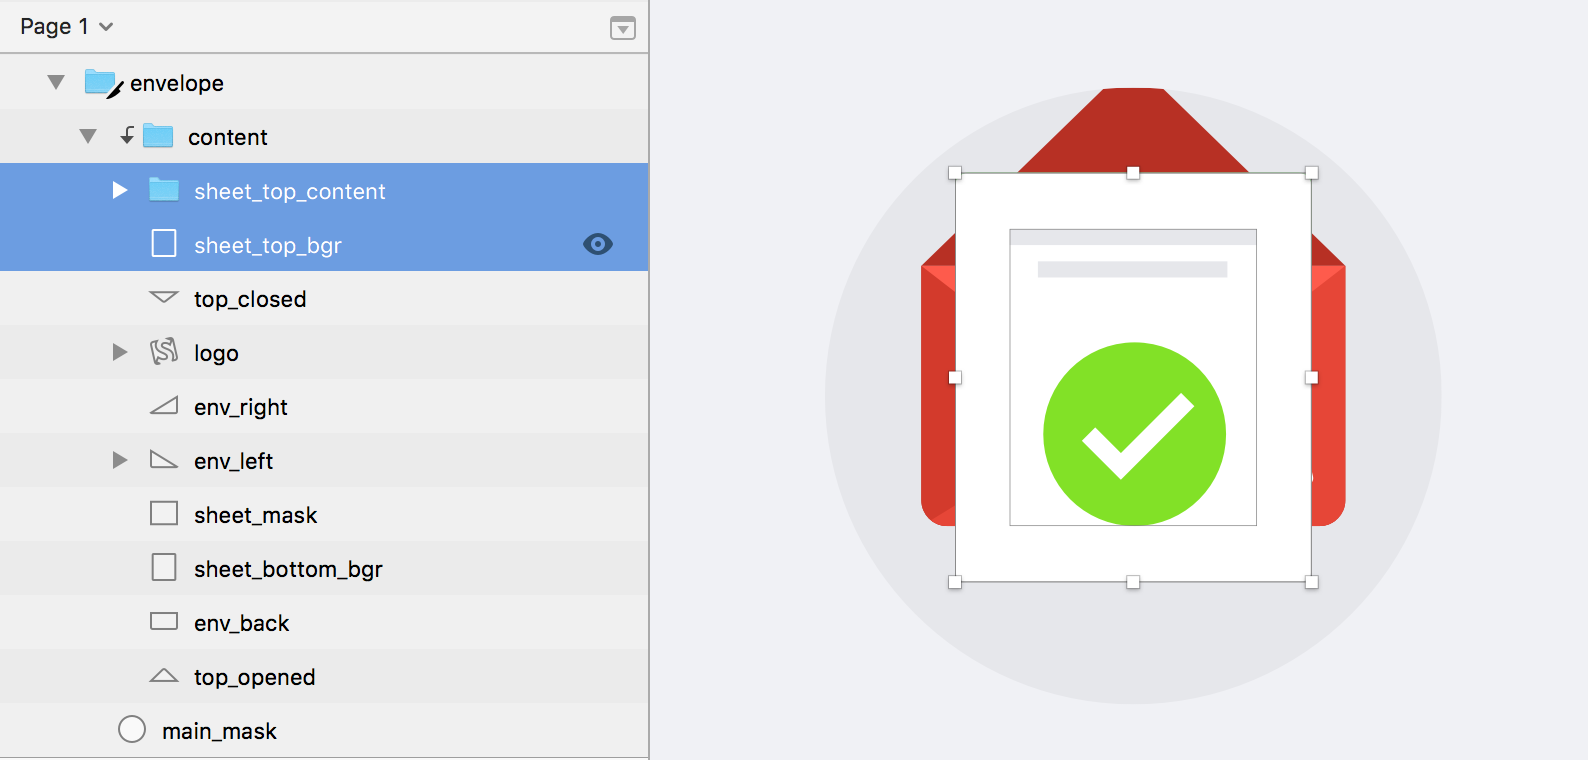
Now that we have the idea in a storyboard and we’ve prepared the master file, let’s export it in a way that we can make sense of in SVGator. Be sure to double-check the layer hierarchy. Think of how a certain layer will interact with another and where it should be placed in the Layers panel. In figure 9, you’ll see we’ve selected “top_opened” — that’s the opened top flap of the envelope. It should stand behind the white sheet of paper. And vice versa, “top_closed” is the closed flap of the envelope, and it should stay on top of everything; that’s why it’s the first layer in our “content” group.
Tip: You might be wondering why the whole top flap is made of two layers. It’s because we can’t rotate shapes or really transform them in 3D space using SVGator. We’re emulating this by squashing the first layer and then stretching the second one, thus creating the illusion of a 3D transformation.

If you look at our storyboard, the original idea was to have the sheet jump out of the envelope and scale up to eventually hide it. We’re going to achieve that by pushing the original sheet up, while having another hidden sheet (“sheet_top”) in front of the envelope (figure 10). The moment they meet at the topmost point, they’ll switch, and the front sheet will fall in front of the envelope. That’s a visual illusion, too — we can’t really move the sheet in z-space, so that’s one way to emulate it.
Taking all of this into account, we can now export the icon. It’s practically a single SVG that contains all of the elements we’ll need, stacked on top of each other in a useful way.
Tip: Be sure to have all elements marked visible (not hidden) before exporting. You can look at the file we’ve used as the export in the Sketch file → Artboard “export”.
Part 2: Animating The Icon
Open SVGator and click “Import new” to start a new project (figure 11):
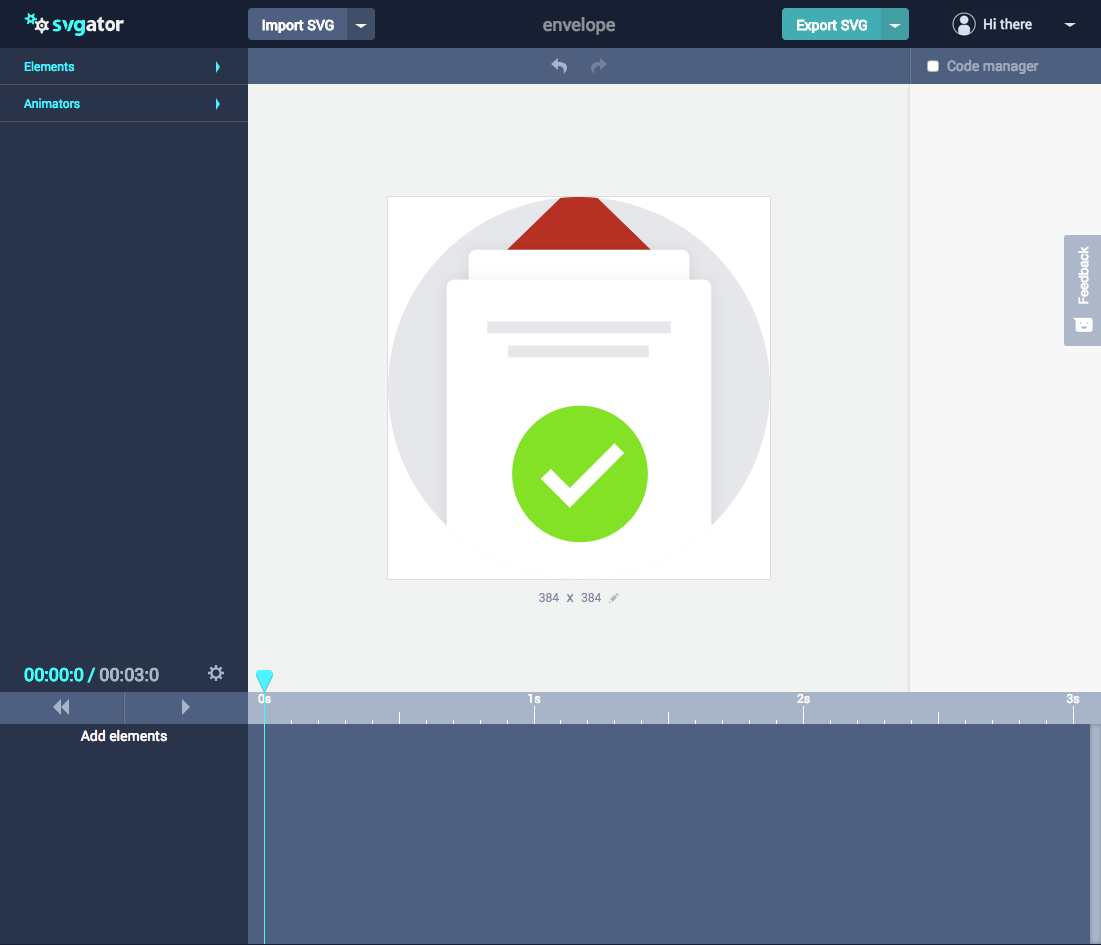
If you’ve done everything correctly, you should see something like figure 12 and the short clip below (clip 1): all layers stacked on top of each other and ready for use. If, by chance, you don’t see everything, go back into Sketch and double-check that all layers are visible.
Animating The Opening Of The Envelope
We’ll start by importing some elements in the timeline. The way SVGator functions is that you’ll start with an empty timeline. You choose which elements to add from the “Elements” dropdown. You’ll have to manually check them using the eye icon to see which is the layer you’re looking for. Alternatively, you can click directly on the element on the screen, which will do the same.
We’re going to work on steps 1 and 2 from the storyboard, specifically on the flap’s opening. Let’s disable the layers we don’t need for now; we’ll come back to them later (see clip 1 to see how to do that). We should be left with just the basic envelope, which means you should disable the following layers: “sheet_top_content”, “sheet_top_bgr” and “sheet_bottom_bgr”.
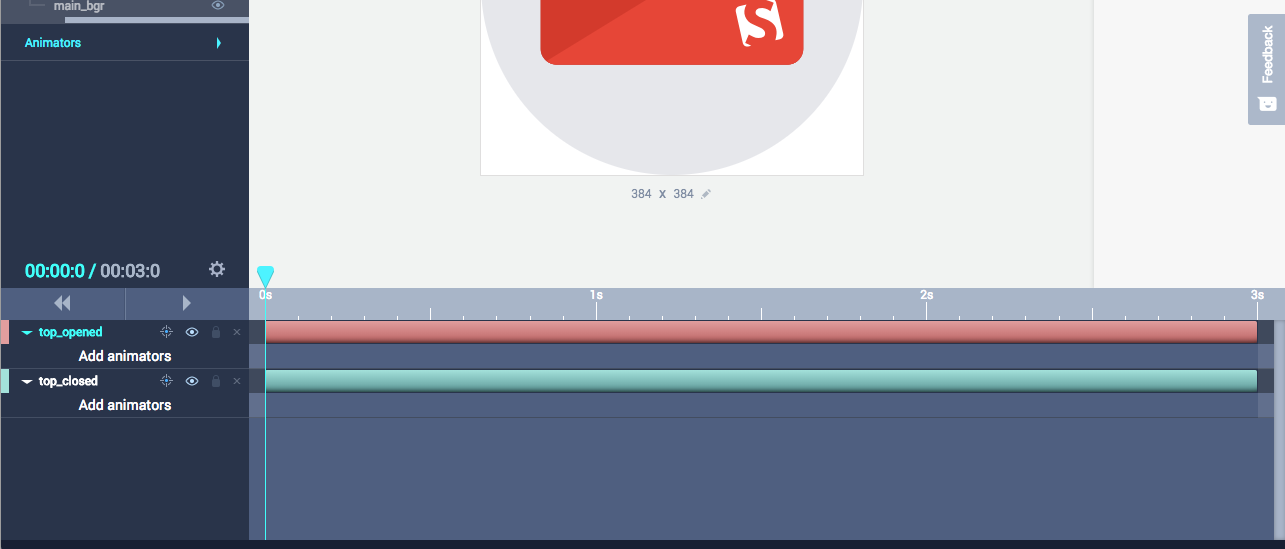
Then, click on “top_opened”, and click the plus icon to the left, or double-click the element to add it to the timeline. Do the same for “top_closed”. Now you should have both layers in the timeline (figure 13).
Tip: If you want to fast-forward through the whole process, check out clip 2 (the actions might not be in the same order as described below).
- Click on “top_closed” in the timeline and then on the “Animators” dropdown. Add a Scale animator.
- Add a Scale animator for “top_opened”, too.
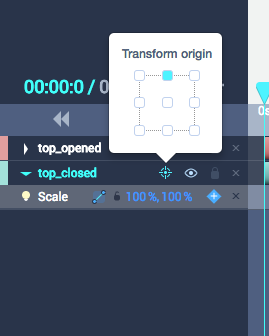
- Then, click on the little target icon next to the layer name in the timeline. This is the transform-origin property, and it lets you set a pivot point for the element’s transformation. Let’s pick top-center for “top_closed”, because we going to shrink it upwards (figure 14), and then bottom-center for “top_opened”.
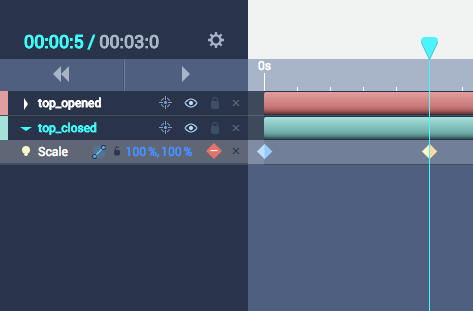
- Now, with “top_closed” selected, click on the plus sign on the Scale property to add a keyframe to the timeline. A yellow diamond shape will appear in the timeline. Let’s move to 0.4s and click the plus sign again (figure 15). That second keyframe will be our final point of transformation, when the flap has already opened. So, let’s make its Scale 100% 0%, leaving the first keyframe as 100% 100%.
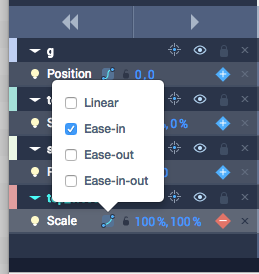
- Turn on Ease-in for “top_closed” by clicking the little target icon next to the layer name (figure 16).
- While on 0.4s, add an Opacity keyframe for “top_closed” by double-clicking Opacity in the “Animators” menu and then clicking the plus sign next to the Opacity property in the timeline. Change it to 0%.
- Go a few frames back, and add 100% for Opacity. We’re doing that to avoid glitching in the top flap part.
Tip: Easing will make the motion look more natural, and because we’re designing an animation that emulates the movement of a single element, it’s natural to ease-in the beginning and ease-out the ending of the animation.
Now, let’s deal with the “top_opened” part, the ending of the animation. As we noted earlier, we’re doing this in two parts to emulate a 3D opening of the flap.
- Grab the “top_opened” layer in the timeline, go to 0.4s in the timeline, and add a Scale keyframe, then another keyframe at 0.8s. Make the Scale at 0.4s be 100% 0% and let the 0.8s Scale value remain 100% 100%.
- Turn on Ease-out. Hit play to preview the animation.
Looks cool, but now the whole envelope needs to move down so that it fits within the circled background. Find a group called just “g” in the Elements, and add a Position animator to it. Add a position keyframe to 0.2s and then to 0.8s. Change the 0.8s value to 0 35. Add Ease-in-out for a smooth animation. And that’s it! We have successfully animated the envelope open and even made it move a bit downwards.
Adding Complexity: The Letter Pops Up
Opening envelope is neat, but we can make it more interesting by introducing a sheet of paper. To do so, we’ll need to reveal the sheet layer, which we called “sheet_bottom_bgr”.
- Click on the eye icon next to “sheet_bottom_bgr” in the “Elements” menu to make it visible. Add it to the timeline (double-click on it).
- Now, go somewhere in the middle of the animation — for example, 0.5s — and add a Position keyframe. Add another one after 0.4s. Select the first keyframe and offset the layer by 140 pixels on the y-axis (0 140).
- Add an Ease-in-out effect. Now we have a bit more interesting animation.
Tip: If you prefer to watch this in a video, check out clip 3 below.
Even More Complexity: Animating The Scaling Of The Letter
To take it further, let’s animate the letter popping out of the envelope, and let’s reveal some lines of text “written” in the letter. To do that, we’ll have to modify the previous animation a bit. (If you want to fast-forward, you could just watch the screencast and repeat it.)
- Start by moving the last Position keyframe of “sheet_bottom_bgr” from 0.9s to 1.1s, and change it to 0 -190. What we’re doing with this is taking the sheet out of the envelope, so that we can quickly swap it with the other sheet we’ve already prepared.
- Go to 1.1s, turn on “sheet_top_content” and “sheet_top_bgr” and add them to the timeline with Position keyframes for both of 0 -190.
- Add keyframes at 1.5s and make them 0 40.
- Enable Ease-out for both.
This is the front sheet’s movement, and it should look like what you see in figure 17.
Now let’s fix the back sheet. It should disappear once the front shows up, and the front sheet should only appear after that.
- Go to 1.1s, and select “sheet_bottom_bgr”. Add an Opacity animator and a keyframe. Set it to 0%.
- Move one frame backwards and set another Opacity keyframe, making it 100%.
Let’s make the respective changes to the front sheet, too:
- Go to 1.1s, select “sheet_top_bgr” and add an Opacity keyframe of 100%.
- Move a frame back, and make the opacity 0%.
You should see something like figure 18 below. We can spot two problems here:
- The content is displayed on top of the envelope before the transition happens.
- There’s a glitch when swapping the back and the front sheet.
Let’s fix the first issue. Let’s hide the content and the checkbox and show it after the front sheet has appeared.
- Go to 1.5s, select “sheet_top_content” and add an Opacity keyframe of 100%.
- Go a frame backwards and set another Opacity keyframe to 0%.
- Now, we’ll make it a bit more interesting by animating each layer within the front content.
- Go to 1.5s and search for the contents of “sheet_top_content” in the Elements menu.
- Add Opacity keyframes for all three layers within “sheet_top_content”.
- Make the Opacity for all three layers 0%.
- Move to 1.7s and set it to 100% for all three layers.
- Stay on 1.7s and select Combined-shape, and add a Rotate keyframe.
- Go to 1.5s and set the rotation to -45deg.
- Add Ease-in-out for the rotation.
The second issue is a glitch that happens because our back sheet disappears too early.
- Go to 1.1s, select “sheet_bottom_bgr” and shift its Opacity keyframes by one frame forward. Here’s what you should be looking at (figure 19):
To make it more appealing, let’s scale the front sheet and content when it pops out of the envelope. We could scale the whole “top_sheet_content”, but that might result in some misalignments in some browsers. It’s best to scale each of its child layers on its own.
- Go to 1.1s, select “sheet_top_bgr” and add a Scale keyframe.
- Do the same for Combined-Shape, “line_top” and “line_bottom”.
- Go to 1.5s and add another Scale keyframe with values of 120% 120%.
- Do the same for Combined-Shape, “line_top” and “line_bottom”.
- Enable Ease-in-out.
- Because we scaled it, we need to decrease the amount that the whole front sheet moves down. Go to 1.5s, select “sheet_top_content” and “sheet_top_bgr”, and change their position from 0 40 to 0 20.
Tip: It’s OK to scale content in SVG because it’s all vector-based, so you won’t lose any quality.
Here’s what it should look like now (figure 20):
All good, but the whole animation needs to loop back to the first frame. That’s because we want to reuse it. Our idea is to have the front sheet slide down and the envelope close and turn to its original position.
- Go to 2.8s, select “sheet_top_bgr” and add Position keyframes.
- Do the same for “sheet_top_content”.
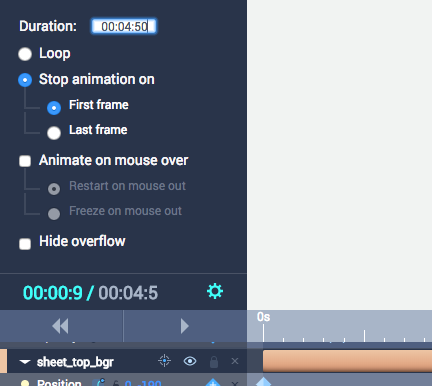
- We need to add more time, because the default timeline is 3s. Click on the cog icon in the bottom-left corner above the timeline, change the duration to 00:04:50 (figure 21), and press “Enter”. We’ve now extended the timeline.
- Move to 3.6s, add another pair of Position keyframes, and make their values 0 360. Change the easing for both layers’ Position to Ease-in-out.
- At 1.3s, select “top_closed” and “top_opened”, and add Scale keyframes.
- Add two more at 1.5s. For the second keyframes, “top_closed” should have 100% 100% and “top_opened” 100% 0%. We’ve successfully closed the flap behind the scaled sheet.
- Now, all we have to do is move the envelope back to the center and make sure the top flap shows up again. Go to 3s and add a Position keyframe for “g”. Add another one at 3.4s, and make it 0 0. Go to 2.8s, and add an Opacity 0% keyframe for “top_closed”. Then, move to 3s and change the opacity to 100%.
Congratulations! We have animated the whole icon. Here’s what it should look like (figure 22):
Part 3: Implementing The Exported Animation In A Real Web Environment
Let’s place the icon in a real environment. We’ve coded a simple newsletter form and included the icon there. You can export the icon from SVGator by clicking “Export SVG”.
After you click “Subscribe”, a thank-you message is displayed, and the icon animation starts.
It works by having two SVG icons: The first one is a static one with just the first frame of the animation included, and the second is the animated one. You can find the static icon in the Sketch file → Artboard “export static”. We’ve included it as an inline SVG element within the code. We’ve also included the animated SVG inline, but hidden it by default. You can check out the code in the download. When “Subscribe” receives a click, we hide the static SVG and show the animated one, which automatically starts.
A minor adjustment we made in the static SVG was to replace this line:
<rect id="sheet_mask" fill="#E6E7EB" fill-rule="evenodd" x="0" y="162" width="384" height="131"></rect>… with this:
<rect id="sheet_mask" fill-rule="evenodd" x="0" y="162" width="384" height="131"></rect>This will remove the gray rectangle that is displayed incorrectly on top of all elements.
This example also shows just how good SVGs are in responsive design: If you make the window smaller, the layout will rearrange, and the icon will enlarge with no loss of quality whatsoever.
Tip: When we made the icon smaller, we found that it takes too much time for the sheet to get out of the canvas, so we had to go back and edit that particular timing a bit to make it shorter. We moved the last Position keyframes of “sheet_top_bgr” and “sheet_top_content” to 3.2s to make the movement faster.
If you want, you can tweak the animation even after you’ve exported it, but it’s much easier to do this in SVGator, where you’ll have the convenient UI.
Conclusion
We’re pretty excited by tools such as SVGator, which really speed up the process when you’re making simple SVG animations. It’s easy to use and you can get a great-looking animation in no time.
- It’s not as powerful as Adobe After Effects, but it’s a lot more adaptive, and it exports everything in code, ready to use on the web. Comparing it to After Effects is apples and oranges, because both tools are so different.
- When using SVGator for rapid explorations, beginners will see greater value in it, but that doesn’t mean that it’s targeted at them only. Advanced users can use the tool to brainstorm or quickly explore ideas without having to use a more complex tool. Because SVGator generates code, you can take it from there and customize anything the way you like. The only drawback is that the whole animation is placed within one timeline, which means that it’s basically one CSS animation, and everything happening inside has a different amount of delay before it fires up. This means you can’t currently fire events at certain steps of the animation, because everything is all-in-one CSS.
- Comparing it to vanilla code is not fair either, because SVGator’s main purpose is to make SVG animation easier and faster. It’s clear that you can achieve more if you code the whole thing from scratch, but how much time would that take you?
- One of SVGator’s strongest advantages is that it’s very beginner-friendly. Anyone can start using it, and the learning curve is close to none if you have experience with at least some design or animation software.
- All users get a seven-day free trial once they create an account. All features are included, and once the trial is over, they can still download the animations from their “My projects” section. You can subscribe to the app monthly ($18 per month), quarterly ($45 per quarter) or annually ($144 per year).
Other Resources About SVGator
- How To Animate SVG Using SVGator (video)
- SVGator’s Twitter (contains many mini-tutorials and frequent updates about the app)
- SVGator FAQ
Other Resources About SVG Animation Using Code
- “How I Stopped Worrying And Learned To Animate SVG,” Boaz Lederer, Medium
- “How To Optimize SVG Code And Animate An SVG Icon Using CSS And Snap.svg Library,” CodyHouse
- “CSS Animations For Non-Developers Part 2 — SVGs,” Nicholas Kramer, Prototypr
- “How to Create Beautiful SVG Animations Easily,” Lewis Menelaws, Medium
A special thanks to Boyan Kostov for helping us with this article — we appreciate your time and effort!
Further Reading
- How To Create Dynamic Donut Charts With TailwindCSS And React
- Better Context Menus With Safe Triangles
- Creating Accessible UI Animations
- Modern Methods For Improving Drupal’s Largest Contentful Paint Core Web Vital